Showing posts with label Chemical Reaction Lab. Show all posts

Wednesday, November 3, 2010

chemical reaction notes and chemical reaction lab

This post is a combination of what happened in chemistry today and yesterday!

So on Tuesday we finished up the notes and started our classifying chemical reactions lab which we finished today.

There are five types of chemical reactions synthesis, decomposition, single replacement, double replacement, and combustion.

We finished talking about the last three:

3. Single replacement. This type of reaction occurs when there are three elements and one replaces another. Element + compoundà product + product. A + BCà AC + B (if A is a metal) or A + BCà BA + C (if A is a nonmetal).

4. Double replacement. This type of reaction occurs when a metal replaces a metal and a nonmetal and nonmetal. Compound + compound product + product. AB + CD à AD + CB.

5. Combustion. This type of reaction occurs when a hydrocarbon reacts with oxygen gas. In general CxHy + O2 à CO2 + H2O.

Then we did the classifying chemical reactions lab. For this lab you did a series of 7 reactions which each represented 4 out of the 5 reactions (everything but combustion).

So this is what you had to do and the observations me and my partner got:

Reaction #1: You had to heat a piece of magnesium metal and let it light and then hold it over an evaporating dish. Our observations for this were, obviously, that the magnesium light up had a bright glow.
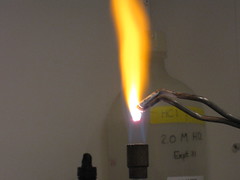
Reaction #2: for this you add hydrochloric acid to a small test tube and then add strip of Magnesium metal. Then you almost immediately light a wood splint and place it in the mouth of a test tube. For this we saw it fizz and make a POP! sound.
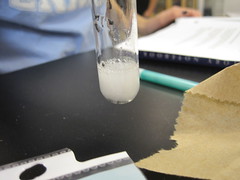
Reaction #3: for this you put a piece of ammonium carbonate in a test tube and heat it for 30 seconds. Then you piece of wet litmus paper in the mouth of the test tube and afterwards test the gas with a wood flint. For this we saw that the stick immediately went out after we put it in and the litmus paper turned blue very fast.

Reaction #4: For this reaction we put calcium carbonate in a test tube and added hydrochloric acid to it. Afterwards we light a wood splint and put the burning splint halfway down the test tube. Our observations for this were that there was no temperature change and the splint went out.
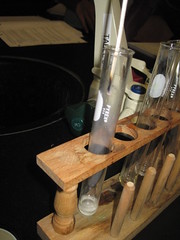
Reaction #5: For reaction five you had to add copper (II) chloride solution into a small test tube and add 1 piece of mossy zinc to the test tube. We observed that the mossy zinc instantly turned black.
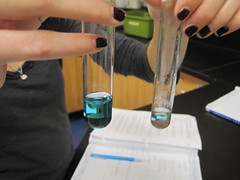
Reaction #6: For this reaction you had to add copper (II) chloride to a small test tube and add sodium phosphate to that. Our observation for this was that the mixture precipitated and clumped.
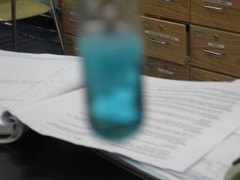
Reaction #7: For the final reaction you add sodium hydroxide solution and phenolphthalein into a test tube and mix the solution. Then you add hydrochloric acid until there is a permanent color change. So as you can guess in this reaction we observed a color change. It went from a clear liquid to a pink liquid.

That was all for the lab and class! Tonight’s homework is to finish this lab, it’s due tomorrow.

The next scribe is ……….. Stephanie K.

Thursday, September 9, 2010

Chemical Reaction Lab


At the beginning of yesterday's class we turned in our separating mixtures lab. Then we proceeded to our lab desks to complete our chemical reaction lab. We had started Part A yesterday, but I'll give a brief summary of part A just to review. We used a Bearal-pipet to fill 6 rows of the well plate with HCl. We were to record both temperature of the HCl and the initial appearance in our data table. This was helpful because after the experiment was over, we could look compare the before and after data.


PART A:

  • The first well we tested was A1. Groups were to put a piece of blue litmus paper in the HCl and record their initial observations, including appearance and temperature change. Next, we added 1 mL of sodium hydroxide solution and noted any temperature change. We waited a minute and tested the solution again with a piece of litmus paper. This was to test the pH of HCl, and to see if the pH would change because of the sodium hydroxide solution.
  • Next, well A2. Groups added solid sodium bicarbonate to the HCl, and were to observe all changes including temperature. Once the reaction had settled down, groups were to add 2 more portions of sodium bicarbonate.
  • For well A3 groups were to use a Beral-type pipet to add 1 mL of silver nitrate solution. Again, we used the date table to record observations.
  • For well A4, groups added a small piece of mossy zinc to the HCl and recorded observations.
  • For well A5, groups were to use the forceps to add one piece of aluminum to well A5, and accord observations in the data table.
  • Lastly, well A6. In A6 we added one piece of magnesium ribbon, and recorded our observations.
  • After part A was completed, groups were to remove unreacted metals from well A4-A6 and rinse the metals with water and throw away.
  • Picture shows the general setup for the wells.

This is the data that I collected for the temperature/appearance changes in Part A.
(sorry if you cant read it)


PART B:
  • Part B was pretty similar to part A, except with cupric chloride instead of HCl.
  • To start off, we added 1 mL of cupric chloride to well B1-B6.
  • Next we placed various items into each well and recorded all observations.
  • For well B1-one piece of aluminum shot was added, B2-aluminum foil, B3-zinc, B4-1 mL ammonium hydroxide solution, B5-1 mL sodium carbonate solution, B6- 1 mL silver nitrate solution.
  • After that, we used forcepes to remove any pieces of unreacted metals from well A4-A6, rinse the metals with water, and dispose.
  • Picture on right shows how some of the metals corroded because of the cupric chloride


Here is my data table for Part B. Sorry again if you can't read it.


PART C:

  • In Part C we used a graduated cylinder to add 10 mL of cupric chloride into a flask.
  • Next, we rinsed the graduated cylinder and added 3 mL of silver nitrate solution to a small test tube.
  • After that, we placed the test tube in the flask, capped the flask with a rubber stopper, and recorded the mass.
  • We inverted the flask several times so the contents of the flask and test tube would mix. We measured the mass again and recorded it.
  • The two masses should be the same.

Here are some things you might want to take a look at:

Tonight's homework:
  1. Study for tomorrows quiz (previous webassigns, chemthink, worksheets, notes, labs etc.)
  2. Complete the lab
The next scribe is Stephanie K.

-Rachel M