Showing posts with label scribe. Show all posts

Wednesday, March 16, 2011

Baby Monkey Going Backwards on a Pig

What a great day in 7th period chem. Arguably the best day of the year. It started out with a discussion about the english mini field trip. Summarized to be "the english teachers needed three periods to assign a project that we all knew we had." Once all of our shenanigans ended, the real chemistry began. We discussed the concept that pressure and temperature both effect solubility.
Container A is under normal pressure and therefore has a normal solubility. Container B is under high pressure and therefore has a higher solubility.
As this graph shows, when the temperature increases, so does the solubility. It is the opposite effect for gases in solution. Ce2(SO4)3 is a hipster.

We then discussed saturation. When the solubility is even with the line on the graphs, the solution is saturated. When there is less solubility than possible, the solution is under saturated. Super saturation comes when a solution is saturated at one temperature, and then is cooled down. This video shows what happens when a super saturated solution is agitated.
This is a video of a baby monkey riding backwards on a pig.

Remember to do the lab. And keep up with your webassigns.
Nicole C can do the next post. Your welcome Nicole.

Tuesday, March 15, 2011

Solution Formation Lab


In the shortened period today we did the Solution Formation Lab. The goal of the lab was to determine the effect of three variables on the solubility of copper sulfate in water. These variables were: crystal size, temperature, and degree of mixing. Based on my group's (Trevor B, Artie B, and myself...decide if you trust us or not) data, we came to the conclusion copper sulfate was most soluble under the following conditions:
  • higher temperature
  • smaller crystals
  • and vigorous stirring


Conversely, the least soluble conditions are:
  • lower temperature
  • larger crystals
  • and little to no stirring

And that's about it for today. Work on your Webassigns and the lab writeup is due Thursday. Until we meet again,
Declan G.

Joining you tomorrow will be the notorious Arthur B

Monday, March 14, 2011

Solution Chemistry Day 1

Today we started our new unit on Solution Chemistry. He handed out a new calendar and a new objective sheet. He then gave us the new notes (not online anywhere). We began the period by looking over tests that we took last week. We made another mighty fine discussion and some good laughs courtesy of the usual people. We began our notes discussion with the definitions:

Solution: a homogeneous mixture (all one colored M&M's)

Solute: is dissolved in the solvent

Saturated solution: is one where the concentration is at a maximum, no more solute is able to dissolve.

Supersaturated: a solution that is made at a higher temperature, and when it cools there is more solute than if it were only saturated.

Mr. Liebs then did a sweet demo of how H2O molecules would break dissolve a Salt (NaCl). The two substances would go through three process's before they would become a solution.

-Separation of the solute: the molecules overcome their IMF, using energy (endothermic)

-Separation of the Solvent: the molecules overcome their IMF, using energy (endo).

-Interaction of solute&solvent: attractive form between solute particles and solvent particles. "solvation"or "hydration" (water=solvent)

We had a brieft discussion about how like molecules disolve like molecules. That was the end of our discussion for todays class.
The NExt Scribe is Declan G

Wednesday, March 9, 2011

Intermolecular Forces

Today was all about intermolecular forces. The first type is called a dispersion force. Dispersion forces are weakest type of intermolecular force, and it is present in every molecule. Dispersion Force also depends on the molar mass of a substance.

The second type of intermolecular force is Dipole forces. Every polar molecule has dipole forces. Since polar molecules have a negative and positive ends, dipole forces cause polar molecules negative ends to attract the positive ends of other molecules and then another molecule will attach and so on.

The third type of intermolecular force is Hydrogen Bond forces. Hydrogen Bonds are basically the same concept of dipole forces, where the negatives attach to the positives, but these forces are a lot stronger. However there is a catch, hydrogen bonds can only happen when a hydrogen bonds to a N, O, or F. These three atoms have the highest electronegativities, so they will create very very polar molecules. A great example of hydrogen bonds is H2O. The intermolecular force in water is great because of the hydrogen bonds. Because the forces are so great, it can cause water to stick together, or bead. These hydrogen bonds are the reason for these to events....


Today we also did a lab exploring the effects of intermolecular forces. These effects include...
-Evaporation Rates
-Capillary Action (A Liquids tendency to climb up the walls of a narrow column)
-Vortex Formation and Relaxation (The time it takes for a liquid to relax after swirling it)
-Viscosity (Resistance to flow)
-Surface Tension (Property shown by water in above photo of the water drops on the penny)
-Beading (Shown in the above picture of the water)

The homework for today is to keep up with the webassigns. There is a reading sheet due tomorrow and all the other HW WAs are due friday. The Lab is also due on friday

The next scribe is....STUART P. Good luck bud

Non-Polar Vs Polar Molecules

The main idea today in class was non polar vs polar molecules.....

Non Polar Molecules
Non polar molecules have symmetry (the charge is evenly spread throughout the molecule) They dont have a positive and negative side. Non Polar molecule NEVER have NON BONDING PAIRS. Non bonding pairs would give the molecule a higher concentration of negative charge on one side, making it polar. It is possible for non polar molecules to have polar bonds, so be careful when determining wether or not it is non polar, its all about the symmetry.
These 2 molecules (CCl3 & BF3) are non polar because the charge is evenly distributed. SYMMETRY!

Polar Molecules
Polar molecules do not have symmetry, they have negative and positive ends. This could be causes by non bonding pairs, which will cause a molecule to have a high concentration of negative charge on one end. It could also be caused by a molecule with more than 2 different atoms around the central atom, one of them having a higher electronegativity will cause more negative charge concentration on one side making it POLAR. A great example of a polar molecule is H2O, or water. Since O has a higher electronegativity then H, all the negative charge concentrates around the O. This causes the O side of this molecule to be negative, and the H side, to be positive. Here are some pictures of Polar Molecules...
Liebs did a demo to show the polarity of water. He had a balloon and he rubbed it against his head. This caused the balloon to take a negative charge. There was also a stream of water dripping from a glass cylinder. When liebs put the balloon close to the water, the water bends towards the balloon. What actually happens is the positive side of the H2O molecule (the H side) is attracted to the balloon. Hopefully now you know more about polar and non polar molecules....

The HW is to make sure you are keeping up with the webassigns


Monday, March 7, 2011

Polarity

A polar molecule is caused caused when the difference in the electronegativity of an atom is between .4 and 1.7. If the difference is between 0 and .4 then the molecule is not polar. In a non-polar molecule the electrons are equally shared between the two atoms that are bonded together. in a polar molecule the electrons are unevenly shared between the atoms that are bonded together. In the bond one of the atoms tends to be negatively charged and the other tends to be positively charged.

One example of a molecule that is not polar is C-C. This molecule is non-polar because the difference in electronegativity of the two atoms is zero.

An example of a polar molecule is C-F. This molecule is polar because the difference in electronegativity is 1.43. Since it is polar the fluorine atom pulls harder on the electrons in the bond then the carbon and thus is partially negative while the carbon is partially positive. The electrons in this covalent bond are still being shared just not 50-50 between the two atoms.

The next scribe is.....Amar B.

Building the Big Ones

Today in class we did our first lab of the new unit. This lab was show students what a molecule with more then one central atom would look like. The molecules we had to build in the lab were, ethanol, acetic acid, serine, and styrene. Each molecule has a very unique shape to it and has many central atoms. In the pictures below black represents a carbon atom, yellow is hydrogen, red is oxygen, and blue is nitrogen.

This atom is ethanol and is comprised of two carbons, six hydrogens, and one oxygen, with the carbons and oxygen being the central atoms.


In this photo is the acetic acid molecule. It is made up of two carbons, four hydrogens, and two oxygens. In this molecule the carbons and one of the oxygens are the central atoms. Also in this molecule the metal springs connecting the carbon and oxygen atoms represent a double bond.


This molecule is serine. It has three carbons, seven hydrogens, three oxygens, and one nitrogen. The three carbons, two of the oxygens, and the hydrogen are the central atoms.

styrene

The final molecule is styrene. This molecule has eight carbons, and ten hydrogens. All eight of the carbons are central atoms.

Thursday, February 24, 2011

Covalent Bonding


Today's topic was covalent bonding. Covalent bonding is bonding between two non metals. In covalent bonding an electron is not lost or gained by an atom or molecule but rather shared between them in bonds. F2 is a very simple example of a covalent bond. They share electrons with each other.


Fluorine only has a single bond. Molecules can have up to triple bonds and can have crazy shapes and patterns depending on what is being bonded and how many are being bonded.


In class we also went over how we can represent covalent bonds in diagrams. One in the pic above is the simpler of the two the other however helps a lot later on when getting into representing bigger molecules. The Lewis Structure.


We got a set of guidelines on how to make a Lewis structure.
1) count the total number of valence electrons and include any ions (+) or (-)
2) Predict the layout of the diagram. First atom listed in the formula is usually in the middle. Just be sure to remember that H can only be bonded to one other atom.
3) Find the number of valence electrons left over from forming the single bonds. Each bond counts as 2 electrons
4) Place the electrons around the outside atoms until each outside atom has 8 electrons around it. Just remember that H follows the duet rule. It only has 2 electrons.
5) Its OK to have more than 8 electrons around the central atom as long as it is the third row or lower on the periodic table. If there isn't enough electrons to put 8 around the central atom then go back and change some of the single bonds to double or triple bonds. C, N, O, and S are commonly know to form double and triple bonds.
Well that about covers everything we went over in class today. HW for today was the Lewis Structure worksheet.
Next scribe is Chris.

Ionic Bonding

Wednesday our class went over ionic bonding. This is the bonding between a metal and a non metal. The main thing in this concept is the Valence electrons. These electrons are what make up the outside energy level.


Ex. 1s22s22p5 The valence electrons for this would be the 2s2 and the 2p5 for a total of 7 valence electrons.


We learned that ionic bonding includes 3 steps: 1) Loss of a e- 2) gain of an e- 3) the atoms or molecules attract.


We also went over how to create a Lewis Diagram as seen on the pic to the right.


The diagram to the right is a lewis diagram of Sodium Chloride. The Sodium wants to get a full energy level and the easiest way to do that is by dropping an electron. The chloride molecule on the other hand wants to get a full energy level by gaining and electron. That is the easiest way for it to get to a full energy level.


That's about all we covered for Wed.

Wednesday, January 26, 2011

If at Once you don't Succeed Try, Try Again.

That saying above doesn't apply for our class today. We were learning about Phase Diagrams:

The Phase Diagram above is on Water!!! So the shaded blue part is where at a certain temperature and pressure the water is a Solid (such as Ice). The shaded green part is where the water is a liquid (Aka water). The shaded pink part (sure i guess you can call it peach) is the water as a gas. (The actual H2O molecule, not O2 or H2 molecules) Anyway...the places where the lines separate the three areas are where the change between the phases happen. The temperature is always on the X-axis and the pressure is always on the Y-axis. The lines tell the points at which the change takes place, but there is almost always a 'normal' melting or 'normal' boiling point. Which for water is 0 degrees Celsius and 100 degrees Celsius. The point on the graph that says "Triple Point" is where at this certain pressure and temperature the substance will be in all three states. We actually saw this happen in one of the demo's Mr. Liebs showed us... I couldn't find a picture of the triple point of nitrogen so I'll just use the picture of water...

As you can see, the Liquid is on the bottom, the Solid is in the center and the Gas is on the top. (trust me the gas is there). The critical point is where the liquid is not a solid, liquid, or gas actually. I know it's hard to believe...but it's true. Liebs tried to show us that it was true with dry ice, but we couldn't get a good enough seal on the container so it didn't work. We tried to seal it many, many times but in the end all we had was a broken ego and a wish to see the critical point. So as you can see, 'if at once you don't succeed try, try again.' doesn't always work. But being as optimistic as we are, we will try it again tomorrow. So either it will work, or we will fail...again.


http://http//www.youtube.com/watch?v=2Z6UJbwxBZI&feature=related This video posted here (look up) is about the critical point of helium. (sorry i still can't get the video into the actual blog)

We were trying to do the same thing with carbon (aka dry ice) but as I said earlier we couldn't get a good enough seal. Also in the video you will hear the word Viscosity. That means the thickness or thinness of a liquid (also used for oils, if anyone needs to put oil in their cars they look at the viscosity to make sure it's right).

Boiling occurs when the vapor pressure and the pressure from outside are equal, or when the vapor presser exceeds that of the outsides. During the Critical point the meniscus:


disappears and the point where liquid and gas are separated is nonexistent:


As you can see, the meniscus has disappeared.
Another thing we learned is the term Sublimation, this is when the solid changes to a vapor totally skipping the liquidation phase.
Please don't forget about the two web assigns. One has been extended from Monday, and is now due tomorrow, then also the web assign that is due on the 31st is up. We also have work sheets that are due on the day of the test.
The Scribe for tomorrow is...Erika G.!!!!!!!!! YAY!!!!! Good Luck Erika! And again sorry about the video, I'll figure it out by next time!!!!!

Tuesday, January 25, 2011

Heat

Well, today was the second day of second semester. We started off class by having Mr.Lieberman show us how to do the graph for the lab we did yesterday. Basically when doing your graph you will beableto notice three distinct regions on the graph. These regions can be identified on the heat curve shown below.
As you can see the first region is where the snow(solid) turned in to water. The second region is just the liquid stage. After this stage there is the region where the water turned into steam. The first and third region are both endothermic. When we finished discussing this Mr. Lieberman told us of the possible error that we might find with our lab results. He said that for some of the data we might have gotten the temperature of the hot plate rather than the water. This would be if we let the thermometer touch the bottom of the beaker when recording the temperature.
When we finished talking about the lab, we worked on the worksheet that we picked up in class today. If you did not get it, you can get it on moodle. Also, if you finished the worksheet and want to review your answers you can get that on moodle as well.On this worksheet two new concepts were introduced, Heat of fusion and Heat of vaporization. The heat of fusion is used for the melting point, and the heat of vaporization is used for the boiling point. These can be found in our textbook.

Mr. Lieberman also did a demo today. Basically it proved if steam or liquid water could get hotter. To do this Mr. Lieberman burned a piece of paper only using steam. This helped to prove that vapor burns were more sever than liquid ones.
Remember that we have a WebAssign due tomorrow as well as the worksheet and lab from Monday.

The next scribe is Danielle D. Have fun!

Monday, January 24, 2011

Heating Curve Lab

    Welcome back!  Today was the first day of the second semester.  Besides getting new seats and some old work back, we also began a new lab.  If you don't have it you can find it here (however this format is slightly different).  We will no longer be using the pre-lab, data, post-lab format.  The new outline for our labs is:


Title:
Lab Goal:
Data/Collections:  (includes data, labeled graph, and percent error)
Conclusion:  (includes claim (according to your data...), evidence (what data did you use 
                   that helped you make this claim?  How did you identify what ever you were 
                   looking for), and reasoning (does your data make sense?  Why might it not be
                   what you expected it to be?)


    In the lab, we filled a 400 mL beaker with about 150 mL of snow/crushed ice.  The goal of the lab was to find out the temperature at which ice melts and boils (using the heating curve).  The next step was to take the initial temperature of the ice.  My group got about -.5º C (however you should turn this number to Kelvin [add 273] because when calculating the percent error it will be difficult to work with Celsius whose freezing point is 0º).  
    
    Next, the beaker was placed on a hot plate and the heat was turned on halfway.  The crushed ice was stirred and every minute it's temperature was taken.  After all the ice melted the hot plate was turned on to full value.  We continued to stir the liquid and take its temperature every minute.  The hot plate was turned off after 3 minutes of boiling (100º C).  


    The data you got (temperature and time of the the different phases of the ice) will now be used to make a graph (recall earlier this year when we used excel to make tables and graphs with curves/lines).  Instead of writing a post lab, you will write up a conclusion summarizing the lab and explaining at what temperature the ice melted and boiled at and why this is so.  


    That was about it for today.  This lab is due wednesday.  Our test will be next thursday (02/03/11).  There is a webassign due tomorrow (tuesday the 25), and don't forget to start the second set of book problems which will be due on the day of the test.  We will also be turning in the first set of book problems that we did before finals.


The next scribe will be Ann Marie C.


Good luck!

Sunday, January 9, 2011

Heat of Formation

On Friday, we first started off with a Heat of Combustion lab. So basically, we added 100 mL of water into the calorimeter which is the can. We also had to mass the candle. We then quickly lit then candle and placed the calorimeter over the fire. Then we waited for the water to reach 35 celsius. Then we blew out the candle and recorded the highest temperature. Then we massed the candle once more to find out how much wax was used in the reaction. The lab is due on Tuesday with the rest of the worksheets and book problems. Ok, this is not cool. It's not letting me upload the pictures, so just look at Flickr to see the pictures of the lab.

http://www.flickr.com/photos/hc1011/5334103360/
http://www.flickr.com/photos/hc1011/5333487119/
http://www.flickr.com/photos/hc1011/5334103324/
http://www.flickr.com/photos/hc1011/5333486983/

After doing the lab, we started learning about Heat of Formation! How exciting. So basically heat of formation is the change in enthalpy that accompanies the formation of one mole of a compound from its elements. Here's a link if you want to learn more about enthalpy! http://en.wikipedia.org/wiki/Enthalpy
By the way, there was no notes sheet about this, so I'll try my best at explaining this. So there's an equation for finding the heat of formation.


So for calculating the Hf (heat of formation), you either have to look it up online, or in the chemistry text book. It's on page 209 or pg 638. Here's a table of what it looks like.
I'm pretty sure Mr. Lieberman said we don't have to memorize it. You only need to use this if it's a compound of two elements. For elements, the heat of formation in its stardard state is 0. Here's an example problem.
Calculate Delta H for reaction Kj/mole. Here's something that you should also consider. The form of the compound (example: gas, liquid, solid) matters.

So first, we find each heat of formation. The heat of formation for NH3 is (-46 kj/mole) You multiply it by 4 because in the equation, there are 4 moles of NH3. Then the heat of formation for O2 is just 0, because oxygen is is in its standard state. Then NO2 is (34 kj/mole) then multiply that by 4. Then finally, H20 is (-286 kj/mole) then multiply that by 6. So then when you multiple it out, the 6 moles of H20=-1716, 4 moles of NO2=136, O2=0, and then 4 moles of NH3=-184. You then take the products-reactants=delta H equation, so (H20+NO2)-(0+ -184)= delta H. Then your answer should equal to -1396. Remember, you always have to do products- reactants, not reactants-products.

After our notes, we had a quick discussion on rare earth metal magnets. To answer Mr. Lieberman's question "do magnets release or absorb energy when pulling them apart, or connecting them together", you have to think about it. Well, you have to use up energy when pulling apart the magnets, and then release energy to combine the magnet. Now think about this. Breaking apart two magnets is like breaking bonds which is an endothermic reaction and combining the magnets is like forming bonds which is an exothermic reaction...
It seems like we'll be learning more about this some other time. Okay, that's it for me. The homework is the pre-lab, webassign, post lab of the heat of combustion, worksheets, AND book problems. Cool. The next scribe is AnnMarie C.

Thursday, January 6, 2011

Endothermic Vs. Exothermic

Hey there!

Alright so today in class we picked up some papers, they are The Heat of Combustion Lab, the Energy Diagram Worksheet, then finally Energy and Reactions. We also picked up some notes but we didn't go over them in class, instead Mr. Lieberman talked to us about Endothermic and Exothermic graphs. The Exothermic graph looks like this:
The reason why the products are lower is beacuse Exo means out, so the reactants lose energy. The reaction Coordinate is just the run time.


The Endothermic Graph looks like this: (Ignore the Delta E it's supposed to be Delta H)
The reason why the products are higher is because Endo means in, so the reactants gain energy. The reaction is the run time. E is the amount of energy. So I bet you're wondering about the Ea and the Delta H right about now. So I'll explain them to you.

Ea stands for Activation enery. That means the energy used to create the product.

Delta H stands for the energy released. That is the energy that was released by the reactant to make the product. The H stands for Enthalpy. The Delta H and q have equal values. So Delta H=q. The q stands for heat gained (or lost). But we cannot just switch q out for Delta H in the formula (to the right)
Here's the reason why.
q can be determined by an experiment: get the mass the specific heat and the temperature change and you can find q. But Delta H is theoretical, and q is actual. So you cannot find Delta H through an experiment. But one way you can find Delta t is the products (on graph) minus the reactants (on graph) no matter which type of transfer there is, it is always products minus reactants.

Mr. Lieberman showed the class some magnets today and was asking about the energy transfer as they connect and as they detach. What do you think? When put together is the energy absorbed or released, and when detached is the energy absorbed or released? How can you tell? I won't answer, just think about it.

Well I lied earlier when I said we didn't go over the notes... We went over one slide but we didn't even look at it on the projector screen. It was the last slide, the sample problem. All we did was copy down two ways to write the change of energy using a methane reaction. Here are the two ways:
(there's supposed to be a space between the H2O and Delta H).
The first way has the equation that was the reaction and product and to the right of the equation was the release of energy. Since the release had a negative effect (the Methane lost 890KJ) the number is a negative. But if instead of losing 890 it gained it, then the number would be positive.
The second way is to add the energy release directly into the problem. The + 890 KJ is just saying the reaction included 890 KJ of energy released.

The pre-lab for Heat if Combustion is due tomorrow, also there is a web assign due tomorrow as well. The worksheets are, like always, due on the last day of the chapter, which this time is the day of the quiz (1/11/11).
Have you figured out the questions I asked earlier? No? Google it!
The next scribe is...Lauren C.!!!! YAY!
Good Luck.
P.S. This took me a lot of time to work out (I had to redo a ton of stuff) So please like it!

Tuesday, January 4, 2011

Specific Heat of Metal Lab

Hey everyone~

So we started class by looking over two of the problems from the worksheet: 8 and 9.
Mr. Liebs explained that problem 8 can be done by setting the amount of energy for copper equal to the amount of energy for water. Knowing that, you can use the law of thermodynamics to solve for the mass of water:

q Copper = q Water
(110)(0.2)(57.5)=(4.18)(2.6)(m)
m= ______

In problem 9, you find the specific heat capacity using the law of thermodynamics again. Once you have calculated the specific heat capacity, you convert moles (because the question asks for you to solve for the molar heat capacity of mercury). You can easily convert it by knowing that the unit for specific heat capacity is J/g C and that the grams of mercury is over 1 mole:

585J=(125.6g)(53.5-20.0) c
c= 0.14 J/gC
0.14J/gC x 200.51g/1 mole = ______

Check the answers on moodle!

After the worksheet, we moved onto our lab: The Specific Heat of Metals Lab
We were assigned to work with our partners and follow the procedures from the lab, which was basically just to...

1. collect a dry test tube and measure the mass
2. mass the test tube with a given metal


3. heat up a beaker full of water until it is boiling
4. Put the test tube inside the boiling water for 10 minutes


5. Fill a calorimeter with about 50 mL of water and measure its volume
6. Then measure the initial temperature


7. After the 10 minutes are up, place the test tube inside the calorimeter and measure its final temperature.


After recording each of these measurements, complete the rest of the lab for homework.

The next scribe is... Paige H.

Monday, January 3, 2011

Thermodynamics

Hey everybody, and unfortunately welcome back from winter break. Today we started class by going over our unit 6 test. Then we took some notes about energy for the rest of the period. If you missed class today then you can get the notes off Moodle.

First we started talking about two forms of energy, kinetic energy, and potential energy. Kinetic energy is produced with motion. Potential energy is stored energy, and it is produced when not in motion. To relate these two, remember that when kinetic energy goes up, potential energy goes down, and vice versa.

Next we talked about temperature and heat. Temperature is the measurement of the kinetic energy of particles, or how fast the particles are moving. Temperature is measured in degrees of celcius, farenheight, or kelvin. Heat is the measure of energy that transfers from an object of high temperature to an object of low temperature. Heat is measured in units of joules, or the stupid american unit of calories, as Liebs tells us. Remember that heat always transfers from high temperature to low temperature. It never transfers the other way around.

To relate temperature and heat we use heat capacity. Heat capacity is different with every object. It is the amount of heat required to raise the temperature of an object by 1 degree celcius. The formula for heat capacity is:

heat supplied (J) / temperature (C) = heat capacity (J/C)

For the homework we need to figure out how much heat is required to raise an object or a substance by a certain temperature. So use these simple formulas to help you out:

heat required = mass x heat capacity x change in temperature
change in temperature= final temperature - initial temperature

Here is a sample problem:
How much energy is required to increase the temperature of 112 g of water from 35 degrees celcius to 80 degrees celcius, if the heat capacity of water is 4.18 J/gC?
Well this pretty easy, all you do is is find the change in temperature by doing 80-35=45. Then you just plug and chug from here.

energy required = (112 g) x (4.18 J/gC) x (45 C).
so the answer is 21067.2 joules

Well that is all for today. The homework tonight is to finish the Heat Calculations Practice worksheet and maybe review a little for the final if you can. The next scribe is Rachel K.

Monday, December 13, 2010

Molar Mass Lab

On the 13th day of Christmas, we did a gas lab. In this Lab we had to find out how much hydrogen was made when Mg and HCl were combined. Heres the formula:


Mg + 2HCl -------> H2 + MgCl2
We then took some copper wire, wrapped it around the magnesium and dropped it in the HCl. This produces the H2 bubbles that collect in the top of the tube.


We measured how much gas was produced by using an instrument call a Eudiometer. That word just rolls off the tongue.Here is the Eudiometer.


Once we found the volume of the gas, we are then able to calculate how much H2 is in the measured volume by subtracting the H2O vapors from the total volume. We are also able to measure the pressure of the H2 using Dalton's Law of Partial Pressures.
If you missed the lab, you can find it here. Homework is to work on the Lab and Worksheets.
This has been Conor H. The next scribe will be Justin.

Friday, December 10, 2010

Nitrogen Ice Cream (and some other exciting stuff)


When have you ever gotten to say you were given ice cream in class? Better yet, when has your teacher actually made you ice cream out of nitrogen?
For those of us in 7th period Chemistry, we were able to experience both of the above.
But before we could get to our dessert making, we learned a lesson or two in chemistry.
We started off by having Bailey and Liebs switch identities. Liebs fell asleep on a fur-lined jacket, while Bailey taught the class how to do the pre lab.
Since you probably weren't paying attention to Bailey, I will review what she said.
For number 1, you need to find the partial pressure. So you do 746 mmHg (the total barometric pressure) and subtract 19.8 mmHg (the pressure of the water) to get 726.2 mmHg.
For number two, you use the answer from 1 and use the combined gas law to find V2.

For number 3, you take the .028 g of Mg given in the problem, and use stoich to convert it to moles of H2.
For number 4, you take the volume of the H2 and divide it by the moles you go in question 3. This is the molar volume of the hydrogen at STP.
Remember, the pre-lab is due Monday, so finish it up over the weekend if you haven't already.
Additionally in class, we talked about some new equations/forms of equations.
Since we know that g/mm is equivalent to number of moles, we can use substitution to get the following equation
PV=gRT/mm

Rearranging this equation, we can solve for density, since g/v=density
Pmm/RT=Density (g/v)

Additionally, we can solve for molar mass.
mm=DRT/P ("mm dirty pee")

Now we have 3 ways to get to moles.
  1. Pure substances-using molar mass
  2. Gases-using PV=nRT
  3. STP- 22.4 L/mole

We worked out two problems from the Gas stoichiometry packet.
Here is the work, in case you missed it.


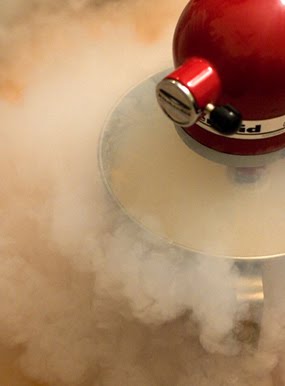
However, while all the above stuff is quite exciting, the most exciting part was when Liebs made us ice cream out of a few simple ingredients: hershey's syrup, milk/cream/half and half, sugar, and liquid nitrogen.

While we may've thought that this concoction was another one of Liebs' silly tricks, it is actually a recipe.
At first it looked like slimy goop, but as soon as the nitrogen worked its magic, we were all mesmerized by the result. We, in turn, were all given a generous portion of homemade chocolate ice cream, and it was quite tasty.
check out the video in the next post, i highly recommend watching it.

Homework: Webassign, pre-lab, worksheets.


The next scribe will be.........Conor.

Thursday, December 9, 2010

Nitrogen Party!!!

Today was a day that was filled with lots of nitrogen, in all three of its forms (including the rare solid nitrogen which few people have ever seen)! We started with some note-taking which you can get off moodle(not posted yet). The notes dealt with a new formula that is called the ideal gas law.

R= PV/NT (couldn't paste equations onto blogger from word)

R is the gas constant. It is equivalent to .082057. P is pressure (atm), V is volume(L), N is the number of moles, and T is temperature (K). This equation certainly is ideal for us because it relates all the variables into one law and we only need 1 circumstance rather than 2. For example, the combined gas law requires 2 circumstances. That is why you need 2 V's (V1 and V2) and so on. The combined gas law is below and it should be used when you have 2 circumstances.

P1V1/T1=P2V2/T2

With these two equations you can solve ideal gas problems which is on the worksheet you received today in class. After much convincing and pestering from the boys in row 1, they were able to convince Liebs to do at least one demo today. So Liebs took some of that awesome liquid nitrogen that he dumped on the floor yesterday, and threw it into the vacuum chamber that the balloon was in yesterday. Liebs lowered the pressure so much that the liquid nitrogen began to boil and finally it became solid. Though its appearance looked foamy, you'd never be able to feel it because once the pressure began to return to 1 atm, it quickly began to revert back to its liquid form. Finally, he dumped it onto the floor where it turned into a gas. That's all 3 forms of nitrogen. Somebody, though I can't remember who, coined the phrase nitrogen party. It certainly was!

Tonight's homework is the prelab for the Molar Volume lab and to do the ideal gas problem worksheet. The next scribe will be Rachel M.

"Life is like a garden: Dig it" ~A wise Man that is not Joe R

Wednesday, December 8, 2010

Pressure, Volume, Temperature, Number of moles!!


Another awesome day Honor chemistry 7th period!! oh yeah
Today we learned relationship between Pressure, Volume, Temperature, and Number of moles by looking at three formulas.
The first one was Boyles' Law

Therefore

As pressure increase volume decrease and when volume in crease pressure decrease.


a constant(k) stay same and pressure and volume are inversely proportional

The next formula was Charles' Law


As Temperature increase volume increase, so volume is directly proportional to temperature
o
B = a constant
Mr. Liebeman show a demo of this formula
He had two beakers and two balloons, and he heat one of them and put the other one into liquid nitrogen. As you can see in this picture the ballon on right side blowed up, because the temperature of air inside of ballon increase and it increase volume. On left side the ballon stuck inside of beaker, because this one was put in liquid nitrogen and cooled, so the air inside of beaker decrease volume.
The last formula was Avogadro's Law


a = a constant

Volume is directly proportional to the number of moles

Overall if we combined these formula to one formula


Whenever each one of value stay same we can cancel out

once again I really think 7th period Honors Chemistry is cooler than any other class haha

tonight's homework is Gas law sheet, and NEXT SCRIBE IS.......JOE R yeahhhh